
 EN
EN
 AR
AR
 NL
NL
 FR
FR
 DE
DE
 IT
IT
 JA
JA
 KO
KO
 PT
PT
 RU
RU
 ES
ES
 TL
TL
 ID
ID
 VI
VI
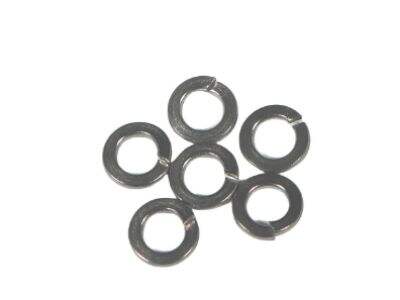
Les ressorts-lavettes sont petits, mais des composants extrêmement essentiels dans toutes sortes de machines et appareils. Leur rôle principal est d'aider à maintenir les choses bien serrées, afin que rien ne s'échappe ou ne se desserre. Cela est crucial parce qu'en cas de desserrage, cela peut créer des problèmes. C'est pourquoi il est important de le faire correctement. Il s'agit d'un guide sur la manière d'installer correctement Ressorts d'écrouillage GB9074 ainsi que quelques erreurs d'installation à éviter pendant le processus.
Importance de l'ajustement correct des ressorts-lavettes
Pour les ressorts-lavettes, l'orientation est d'une grande importance. Ces petits composants sont essentiels pour maintenir le bon fonctionnement des machines et appareils. Une installation incorrecte des lavettes peut entraîner des conséquences catastrophiques. C'est à ce moment que des composants de la machine peuvent se détacher, voire tomber en panne. Non seulement cela peut être dangereux, mais cela peut aussi entraîner des réparations coûteuses qui auraient pu être évitées. Par conséquent, prendre le temps d'installer correctement ces lavettes est primordial en matière de sécurité et d'efficacité.
Installation des ressorts-lavettes : Quand les utiliser (Guide étape par étape)
Un processus étape par étape pour installer correctement les ressorts-lavettes.
Rassemblez vos matériaux
Assurez-vous d'avoir tous les outils nécessaires avant de commencer. Cela inclut les Ressorts d'écrouillage GB93-87 , boulons ou vis, et tout autre outil dont vous pourriez avoir besoin, comme une clé ou un tournevis. Vous devez tout préparer à l'avance, afin que ce soit facile et rapide à accomplir.
Choisir la bonne taille
Choisissez un ressort-écarteur avec la bonne taille correspondant au boulon ou à la vis utilisée. L'écarteur doit être serré correctement sur le boulon ou la vis, ni trop serré ni trop lâche. Un écarteur peut facilement être trop grand, et dans ce cas il ne fonctionnera pas correctement, ou trop petit, auquel cas il ne rentrera pas du tout.
Insérez le Boulon ou la Vis
À ce stade, vous pouvez insérer le boulon ou la vis à l'endroit où elle sera fixée. Assurez-vous qu'il s'insère droit et est bien aligné. Cette étape est également importante car un boulon tordu causera des problèmes à l'avenir.
Mettez le Ressort-Ecarteur
Faites glisser le ressort-écarteur sur le boulon ou la vis ensuite. Placement correct de l'O-ring sur le boulon/le manchon de la vis. L'écarteur doit être bien plat contre la surface — cela fonctionnera ainsi de manière plus efficace.
Serrez-le
Étape 5 : Serrez le boulon/visserré afin qu'il soit bien serré. N'oubliez pas de ne pas trop serrer, car cela peut aussi poser des problèmes.
Erreurs Communes lors de l'Installation d'un Ressort-Ecarteur
Erreurs Communes à Éviter Pendant Ressorts d'écrouillage GB 859 Installation :
Utiliser la Mauvaise Taille
Utiliser le Mauvais Taille de Joint l'une des plus grandes erreurs. L'utilisation d'un joint qui n'est pas dimensionné correctement peut entraîner une fonctionnalité lente ou il pourrait même se casser pendant le fonctionnement. Ne jamais installer sans double vérifier la taille.
Utiliser Trop Peu de Joints
Erreur #2 : Ne pas utiliser assez de joints. Pas assez de joints causera que ce boulon ou vis devienne desserré avec le temps. Si vous pouvez l'éviter, alors ne choisissez pas l'approche d'un seul joint car la prise ne sera pas forte.
Erreur #1 : Placer le Joint dans le Mauvais Endroit
Si vous installez le joint à l'envers ou à contresens, il ne fonctionnera pas correctement. Assurez-vous de noter dans quelle direction le joint doit être orienté. Ce détail aura un impact important sur ses performances.
Comment Sélectionner le Bon Type de Joint en Spirale
Conseils Utiles pour Sélectionner le Bon Joint en Spirale pour Vous :
Réfléchissez au Matériau
Les ressorts-écarteurs sont fabriqués à partir de divers matériaux, y compris l'acier inoxydable et le laiton. Comme chaque matériau a des caractéristiques uniques, vous devez choisir celui qui convient le mieux à votre application. Un bon exemple est l'acier inoxydable, qui ne rouille pas et est donc idéal pour être utilisé partout où de l'eau pourrait entrer en contact avec la zone.
Prenez en compte la charge
La puissance du ressort-écarteur aidera à déterminer sa résistance nécessaire, en fonction du poids et de la charge que la machine ou l'appareil devra supporter. Choisissez un ressort-écarteur capable de soutenir cette charge, sinon il risque de se plier/casser.
Examinez l'environnement
Si la machine sera utilisée dans des environnements difficiles, comme des températures extrêmes ou un contact avec des produits chimiques, choisissez un ressort-écarteur qui ne se corrodera ni ne se dissoudra. Certains ressorts-écarteurs sont conçus pour résister à des environnements plus sévères que d'autres, alors choisissez judicieusement.
Optimiser vos ressorts-écarteurs
Le bon positionnement des ressorts à lames, pour fonctionner de manière plus efficace et durer plus longtemps. Voici quelques conseils à prendre en compte pour obtenir des résultats optimaux :
Utilisez la bonne taille
La taille du joint que vous choisissez est également importante. Si un joint ne s'adapte pas correctement, il n'offre pas un soutien et une tension adéquats, ce qui est l'essence de l'efficacité de l'assemblage.
Utilisez le bon nombre
Assurez-vous d'utiliser le bon nombre de joints. Le modèle approprié et précis doit garantir que la vis ou le boulon reste bien serré, empêchant tout mouvement indésirable.
Installez les joints de la bonne manière
Assurez-vous toujours d'installer le joint dans la bonne direction. Un joint correctement placé permettra de maintenir tout en place et de fonctionner correctement.
Conclusion
Les ressorts-écarteurs peuvent avoir l'air simples, pourtant ils sont essentiels pour garantir que les machines et appareils fonctionnent de manière fluide et vous aident à éviter des factures de réparation coûteuses plus tard, à condition qu'ils soient correctement installés. En suivant ces lignes directrices tout en évitant les pièges les plus courants, vous vous assurez que vos ressorts-écarteurs sont installés correctement et fonctionnent à leur meilleur niveau. Parcourez tous les produits WAN GU pour trouver des ressorts-écarteurs de qualité adaptés à vos besoins.
